Epigentic Orthodontics Case Study: Part 1
I have been in the dental field for 6 years and am constantly surprised with all the innovations and dynamic new ways to approach treating a variety of dental conditions. There is always something new brewing for the modern dental office to integrate. With that in mind, here at Alder Advanced Dentistry we have begun to re develop our approach to Orthodontics from a 2-dimensional technique to 3-dimensional. This technique is sometimes referred to as Epigenetic Orthodontics.
What does this mean exactly? Epigenetic Orthodontics naturally grows and restructures the upper and lower jaws without invasive procedures or surgery. Studies have shown that due to environmental factors and processed foods humans are facially not developing to their full growth potential. When looking at skulls from the pre-Industrial Revolution, scientists have found that the frequency of mid face deficiencies is much less than it is today.
Traditional Orthodontics is great at straightening teeth out, but can be limited on treating other conditions depending on where the upper maxilla and lower mandible are positioned. With Epigenetic Orthodontics we can improve or treat the following conditions:
- Misaligned teeth
- TMD/TMJ issues
- Sleep Apnea/OSA
- Head, neck, & back pain
- Cosmetically enhance a person’s appearance without surgery
- Help develop the mixed dentition to full growth potential
What happens if your child’s dental arches do not have enough room for all their permanent teeth? Most Orthodontists would recommend extracting all four permanent 1st premolar teeth to make room for the remaining dentition. But why remove four perfectly healthy teeth when you could keep them by growing additional bone in the dental arch to accommodate all the existing teeth?
We can grow new bone with very specific types of growth guidance dental appliances. These are designed to place pressure on a specific spot on the palate about 4 mm behind your front teeth. This applied pressure stimulates stem cell growth of the upper arch that then creates dense, healthy new bone structure. Once the prescribed amount of bone growth has been achieved, phase II is initiated with the Controlled Arch bracketing system that will bring the posterior teeth forward into the new bone growth. All the fine-tuning finishes are completed to the upper and lower arches during this treatment phase before the patient moves into the retention phase.
The above is just a simplified explanation of what Epigenetic Orthodontics looks like at Adler Advanced Dentistry. In order to give a more detailed overview of the process I am going to share my journey while going through this treatment.
My Symptoms and Dental History
I went through traditional orthodontics when I was in middle school. Before treatment could begin I had all my 1st premolars extracted to make space for my remaining permanent teeth. I also had the joy of experiencing a thumb habit appliance and headgear. Needless to say, my parents spent a lot of time with me at the dentist. Once my orthodontic treatment was complete everyone thought the results looked great. And on the surface, it did. My teeth were straight and functioned well.
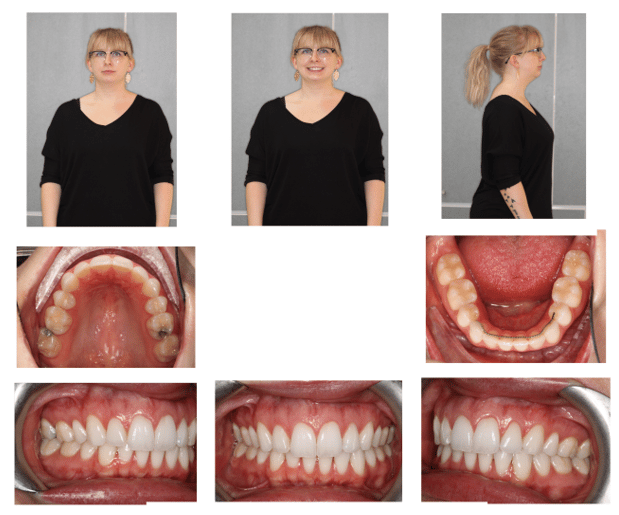
Pre-Treatment Records
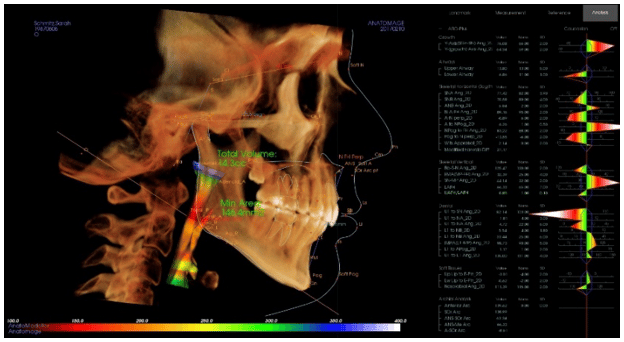
Once it was determined that this treatment would be ideal for my concerns we began to gather the necessary information to come up with a customized treatment plan. We took a CBCT x-ray, photos, measurements, and digital impressions of my dental arches & bite.
Appliance Seat – July 2017
About 2 weeks before we seated the upper growth guidance appliance we placed spacers between my upper premolar and molar teeth to make room for the bands of the appliance.
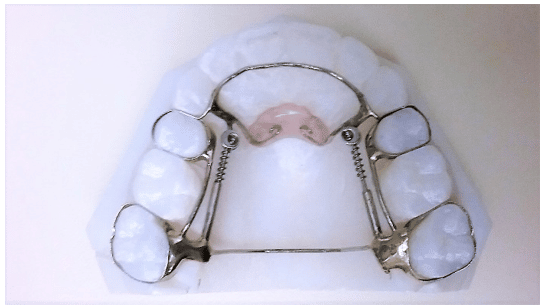
In the figure below is my Fixed Growth Guidance Appliance on a printed model of my upper arch. You will notice that there are two bands on each side that are cemented around my premolars and molars. There is also a wire running along the backs of the front 6 teeth that will be bonded to them during phase I of treatment. By bonding part of the appliance to the front teeth it will help prevent them from flaring out as the palate is growing forward. The space that is going to emerge during the growth phase will be behind my canine teeth. The acrylic pad in the middle is where the springs are placing pressure on the palate and stimulating the growth. The wire towards the back/bottom of the appliance is only used to stabilize the appliance while cementing it, but is then removed.
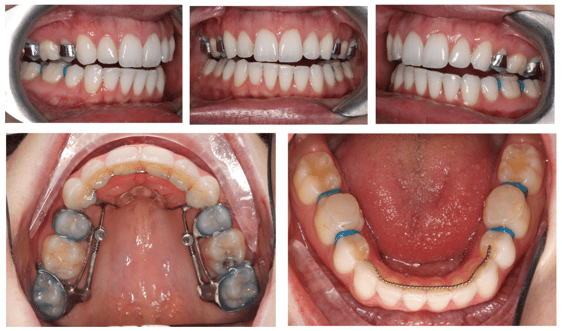
Appliance Seat
During the same visit as the appliance seat lower 1st and 2nd molar pads were bonded on the chewing surface of my teeth. These pads remain in place during phase I and most of phase II treatment. Their function is to separate the arches so that my lower front teeth do not interfere with the appliance on the upper front teeth. The pads are also flattened so that the arches do not lock together in a specific position. Since my lower jaw is no longer trapped by my upper arch it is free to develop to its’ full growth potential. While we are growing the upper arch forward, the condyle head of my lower arch will remodel and grow forward while the pitch of my jaw will level out.
See also:
Epigenetic Orthodontics Case Study: Part 2
Epigenetic Orthodontics Case Study: Part 3

